本文章是用windows2003服务器系统,使用单网卡配置VPN服务,特点是可以多人共同拨入VPN,不像XP系统,一次只能一条线路拨入。
服务端设置(windows2003操作系统):
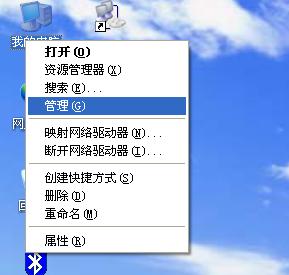
首先是为VPN远程连接建立一个登录的用户,在桌面——我的电脑——右键——点击“管理”
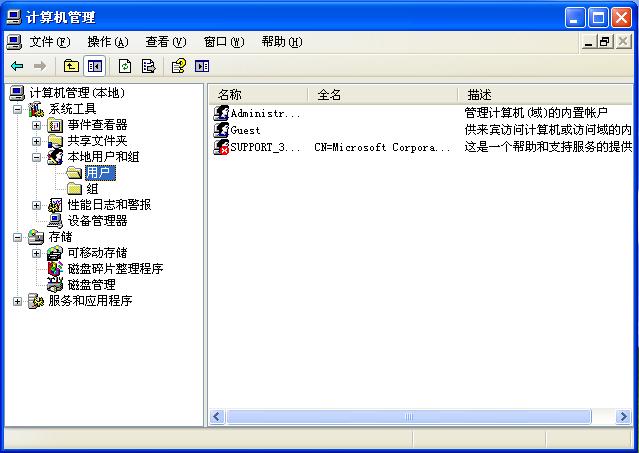
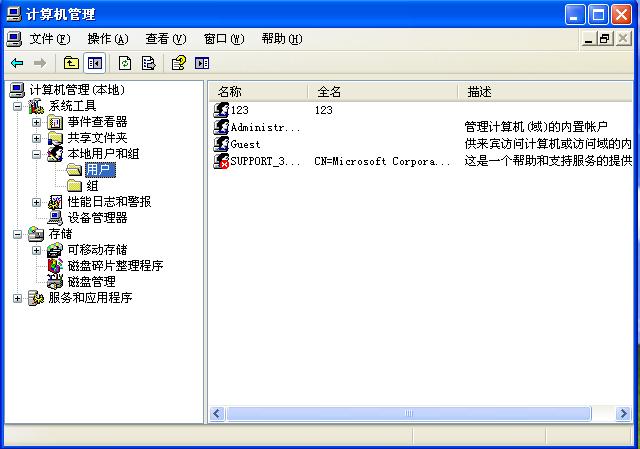
点击“计算机管理”——“系统工具”——“本地用户和组”——“用户”
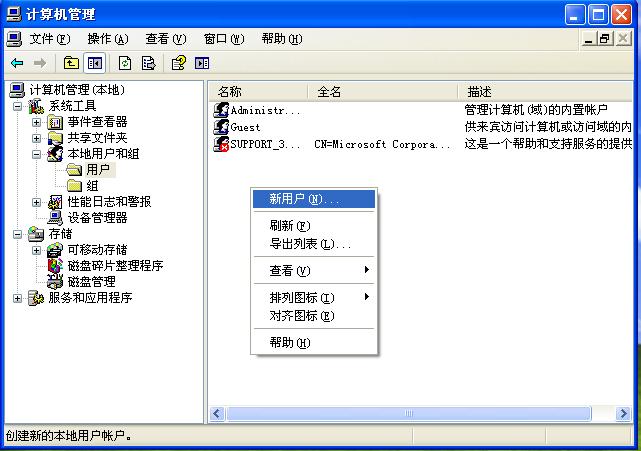
在右侧点击右键——点击“新用户”
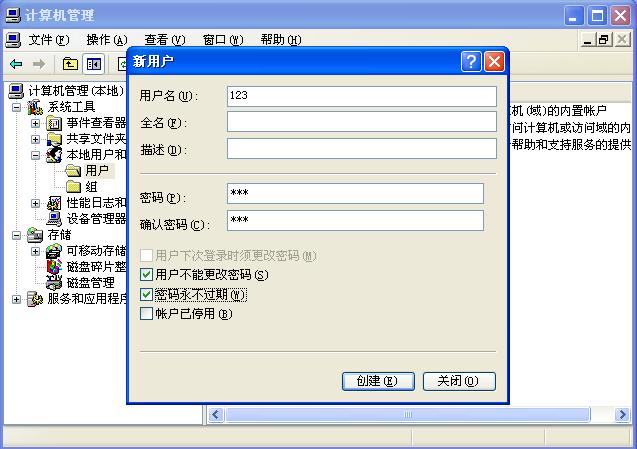
添加用户名、密码、确认密码,勾选“用户不能更改密码”、“密码永不过期”并点击创建
我们看到了右侧多了一个叫“123”的用户
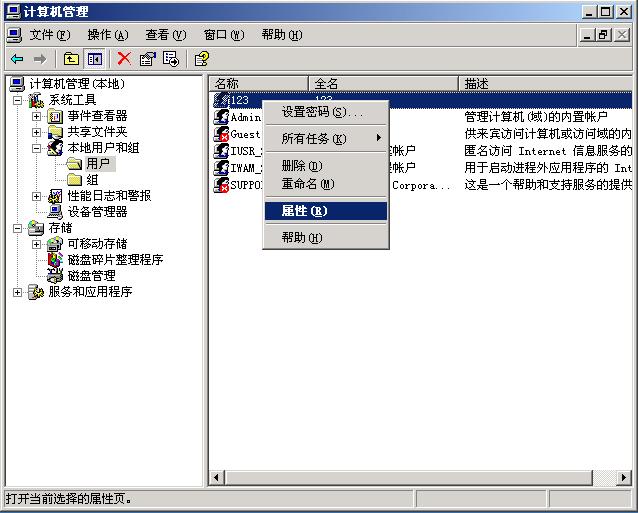
下面我们为VPN拨入的用户123 设置权限,在123这个用户上右键——属性
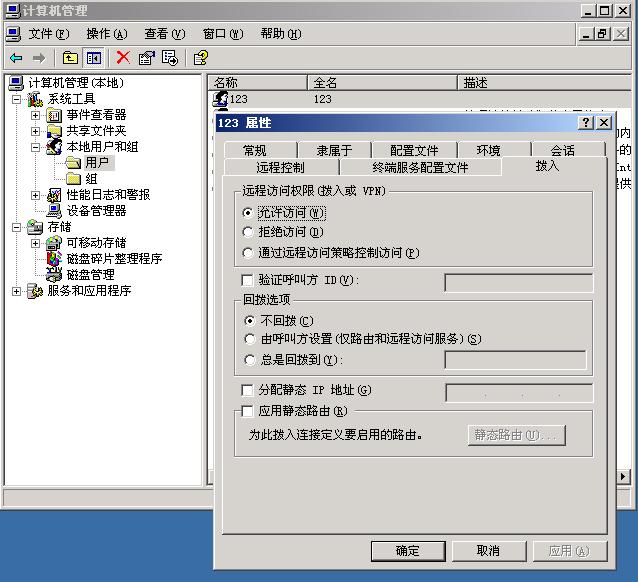
在“拨入”标签下——“远程访问权限”选择“允许访问”——点击确定
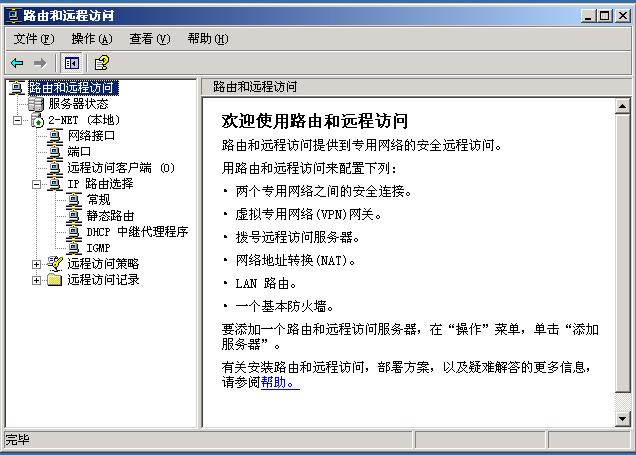
至此,用于VPN拨号的用户已经准备好了,下面我们进行2003系统VPN服务的配置
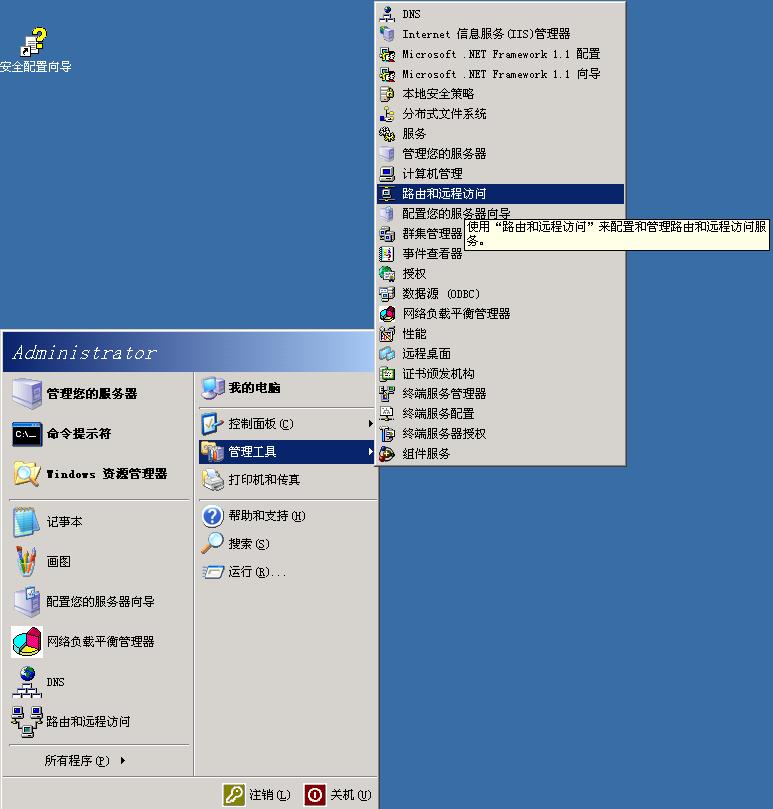
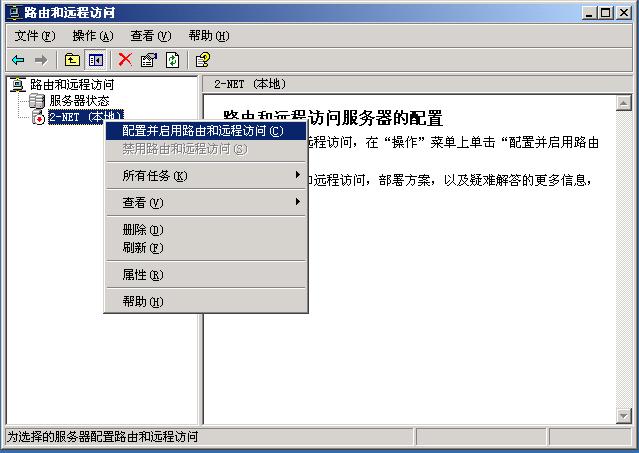
点击开始菜单——管理工具——路由和远程访问
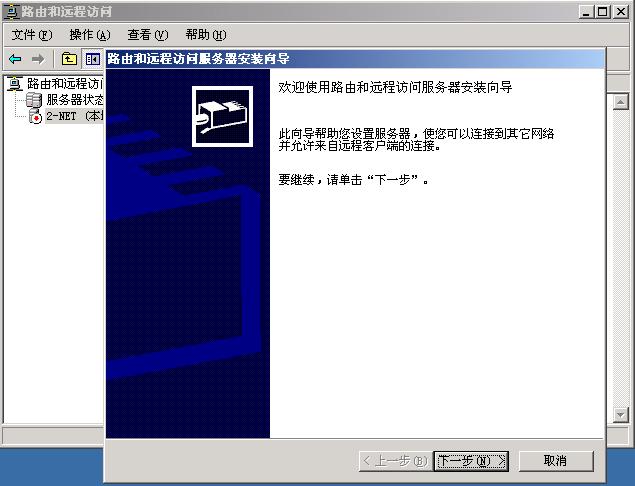
在本地服务器上右键——配置并启用路由和远程访问——下一步
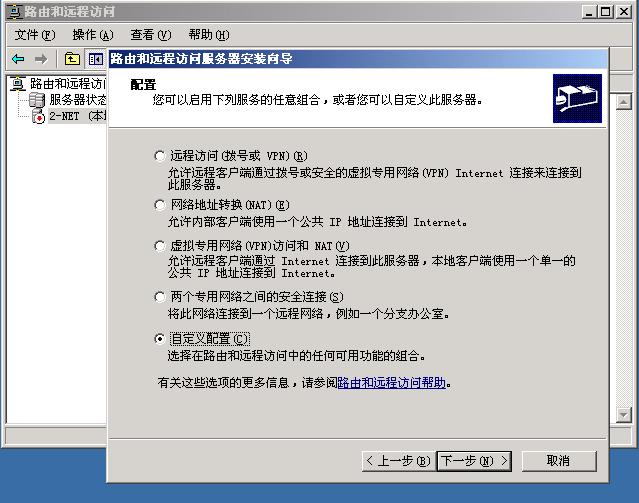
自定义配置
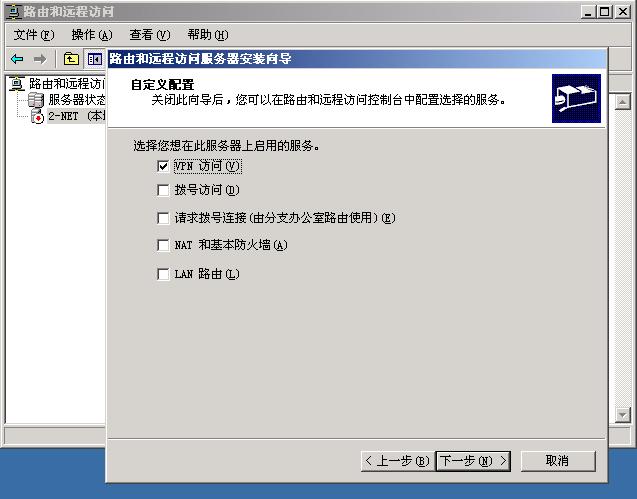
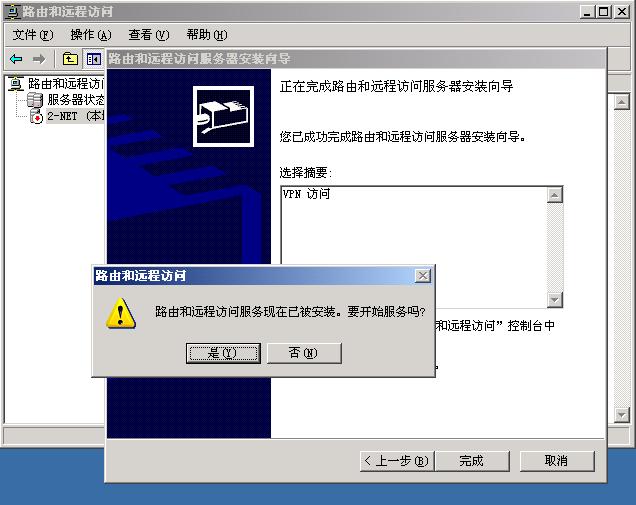
勾选“VPN访问”复选框——点击完成
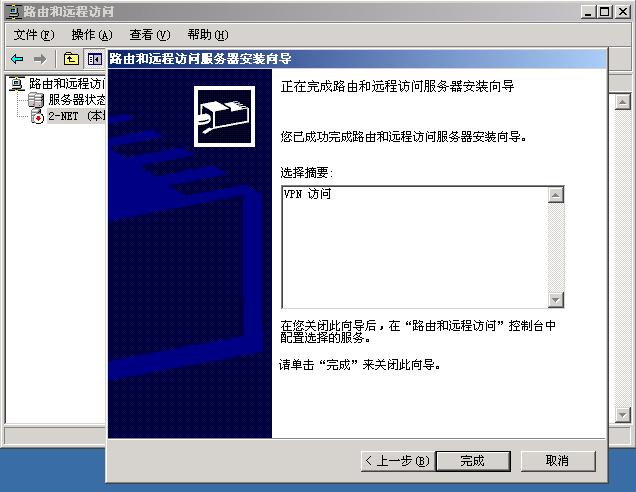
点击“是”开始服务

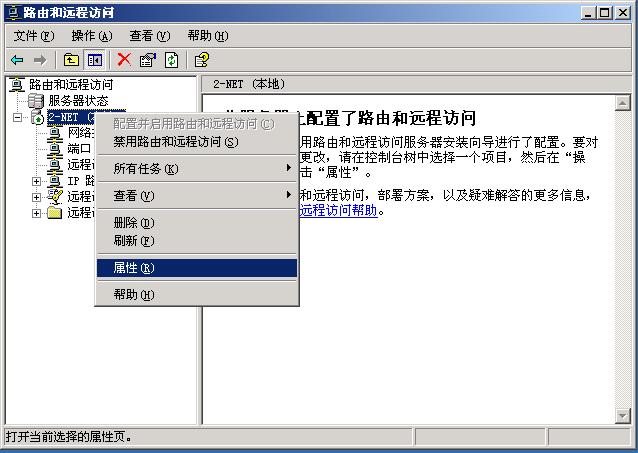
在本地服务器上右键——属性
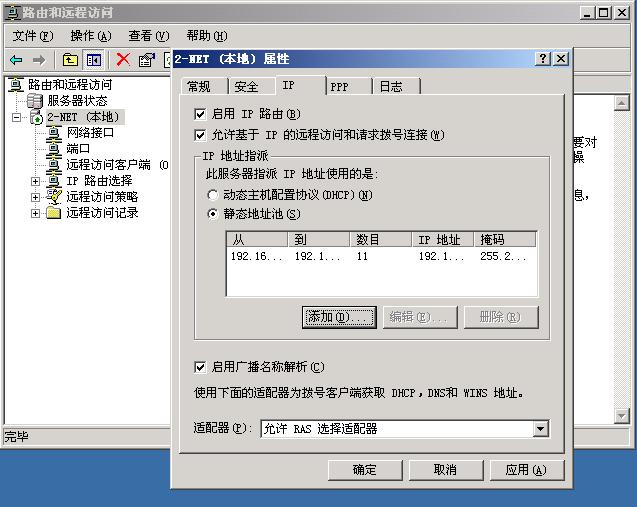
在IP 标签下选择“静态地址池”——点击添加按钮——填写分配的拨入IP段
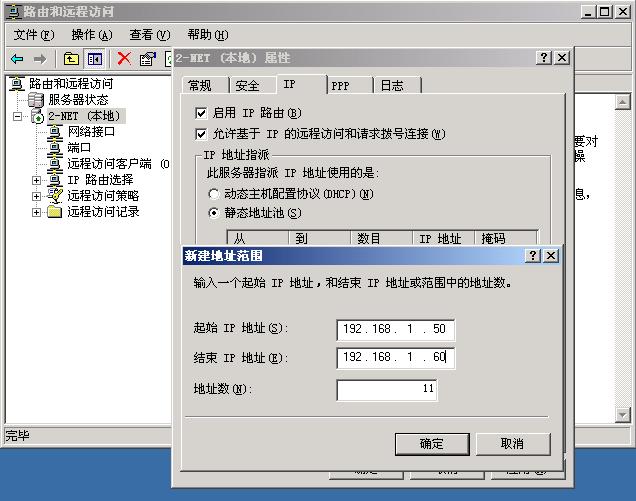
点击确定
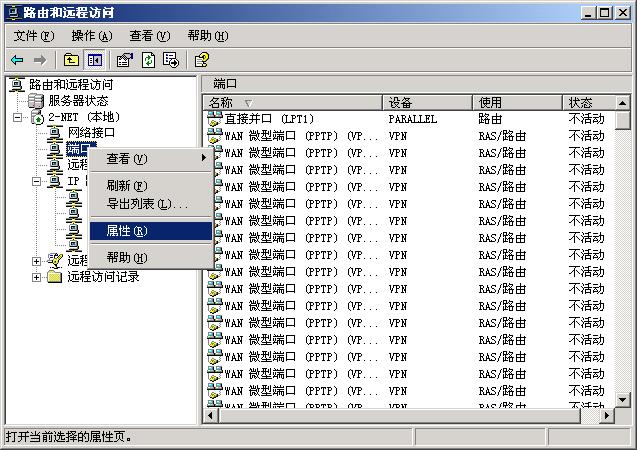
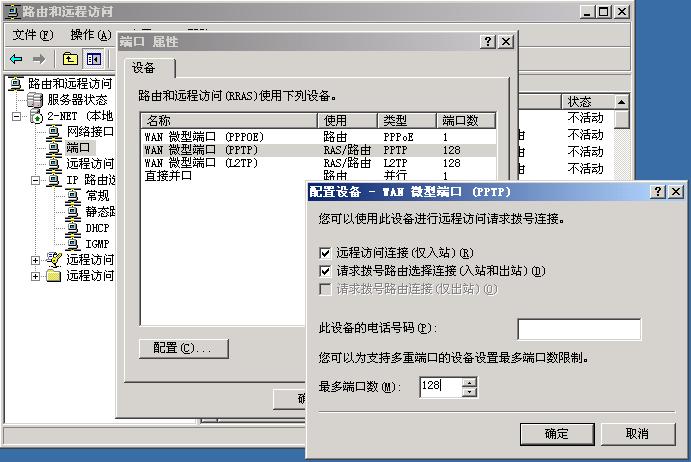
右键点击“端口”——属性
可以看到PPTP协议可以允许的“端口数”,也就是连接数128个
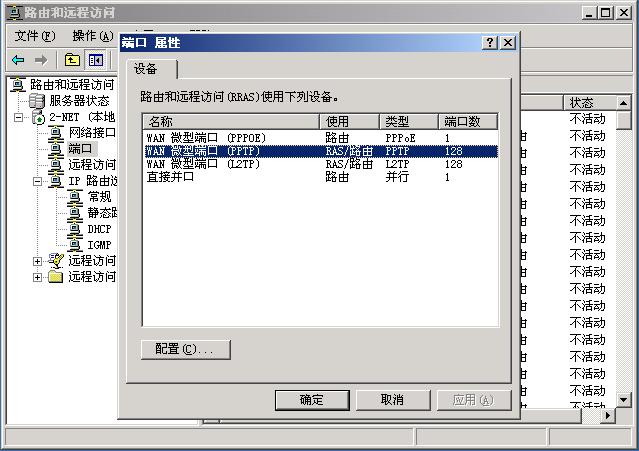
点击“配置”按钮——可以修改其最大连接数目
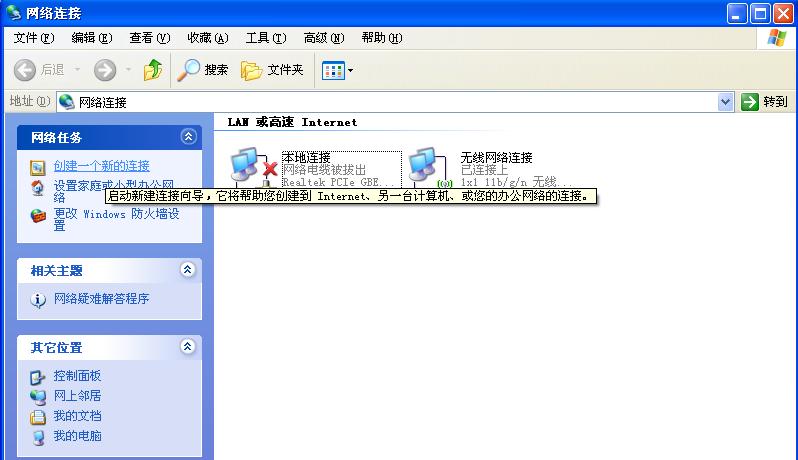
客户端配置(XP操作系统):
点击“开始菜单”——“连接到”——“显示所有连接”

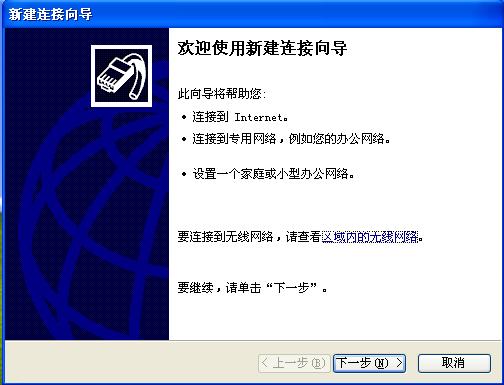
点击左侧“创建一个新的连接”——点击下一步
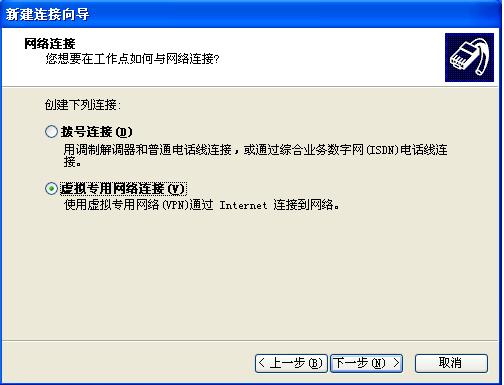
选择“连接到我的工作场所的网络”
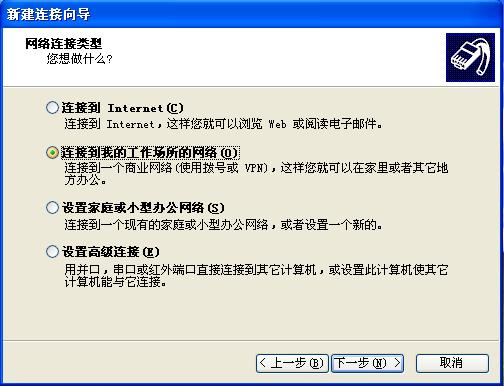
选择“虚拟专用网络连接”
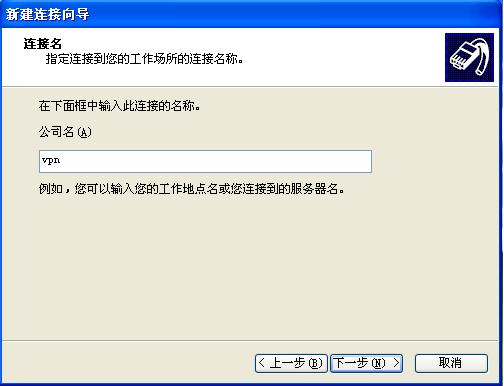
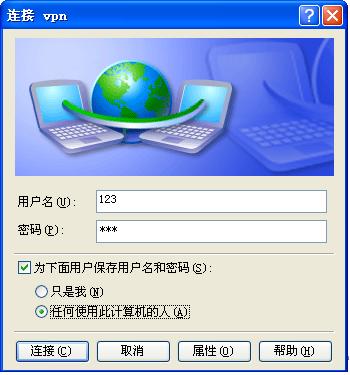
给我们的VPN拨号起个名字叫VPN
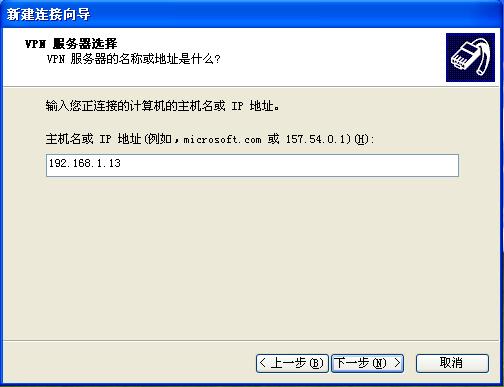
填写服务端VPN的IP地址或者域名
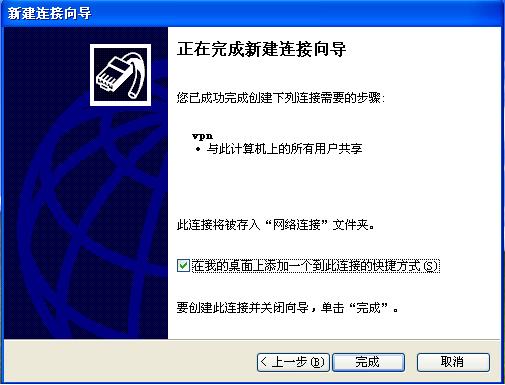
勾选“在桌面添加快捷方式”——点击完成
弹出登录窗口,填写我们刚才在服务器上建立的用户123,和密码,点击连接
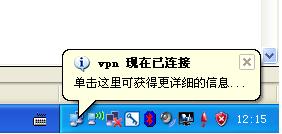
连接成功,此时在屏幕右下角看到了连接提示。
总结与拓展:
到此为止,我们已经成功的建立VPN服务,并用客户端进行了连接,但是这样一来,我们将有两个网关,一个是VPN的网关,一个是自己本身的网关,上Internet的时候,电脑不知道该走哪一个啦,要想连接后还能上外网可以这样操作:
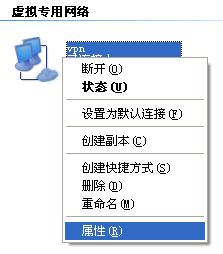
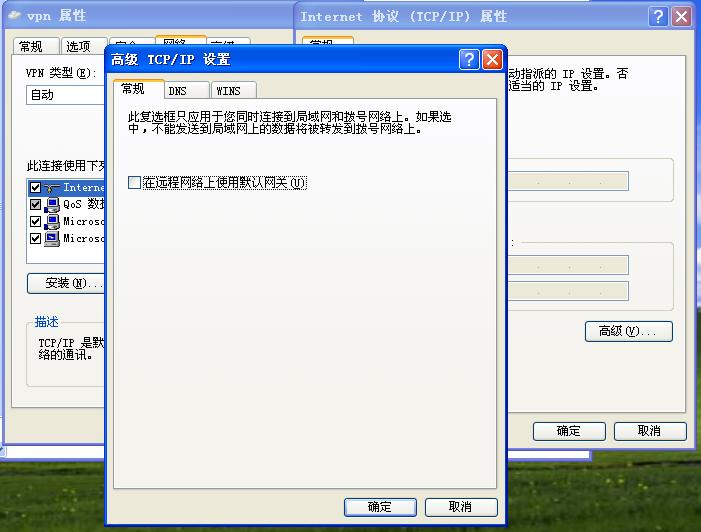
点击“开始菜单”——“连接到”——“显示所有连接”
在连接里面找到VPN拨号的图标,点击右键——属性
在“网络标签”里选择Internet协议(TCP/IP)——点击属性按钮——高级按钮
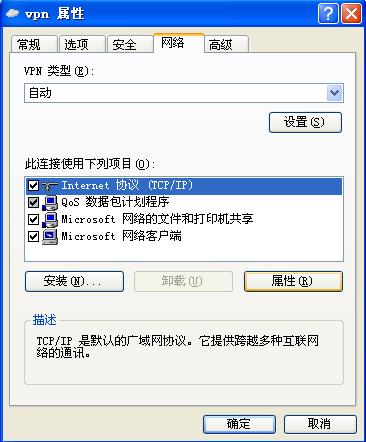

在“高级”的“常规”标签里面 取消勾选“在远程网络上使用默认网关”
至此,我们虽建立了VPN但是,访问外网的时候,还是用的自己的网关。
|